Showing posts with label Holiday. Show all posts

Wednesday, September 28, 2011

Witch Shoes and Broom

Oh how I love Halloween!  I love the decorations, the fun, the candy, dressing up... EVERYTHING!  I love that there is no meaning to miss, or make sure you focus on.  It's just dress up, have fun and get candy!  Don't get me wrong I love the meaningful holidays too but Halloween is so great!  Plus the more dirt, leaves, and cobwebs the better!  To start off my Halloween decor I HAD to do this!  The thought has been stuck in my head for days and I could not rest until it was made a reality!  I was in such a hurry to get it out of my head I didn't take step by step pictures, too bad.  SO here is what I did.

I went outside and examined my trees for a branch the was just crooked enough to make a great broomstick.  Got out my ladder and saw and cut it down... Shh my husband doesn't know that yet.  I was laughing at myself as my 8 month pregnant body was outside in my PJ's up on a ladder while the HOA landscapers where down my street doing their rounds!  Anyways, here is a hint I made my broomstick as tall as I wanted the whole broom to be so that the bristle would have some extra sturdiness.  


Then I found two small brooms (which were hard to find) at Dollar Tree, made entirely out of the bristles.  I cut them in half and hot glued and then tied on the the stick.


Then I went to Goodwill... any second hand store will do.  Find a pair of shoes that look like they can pass as witch shoes.  I found this pair pretty easy, didn't even search around and since I wasn't worried about the size it was super simple.  Originally the shoes didn't have a buckle so I went to the belts and amazingly I found two of the SAME belt in black!  Got home buckled my belts cut them and hot glued the cut ends underneath!  TA-DA witch shoes from the thrift store!


I may make a sign to go with it, or I may just leave it... I really like it the way it is... we shall see! 
Tuesday, February 15, 2011

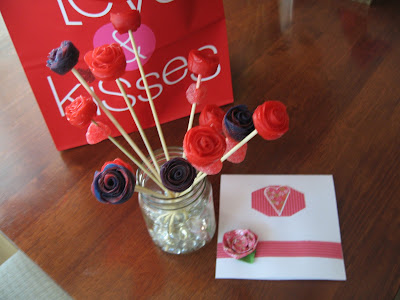
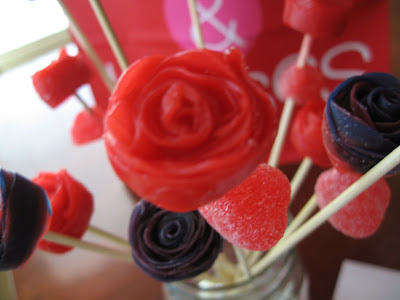
Gummy Roses

This is what I made my hubby for Valentine's Day!

A dozen gummy roses! My husband loves gummy stuff and so I got Fruit by the Foot cut them down the middle in a wave and rolled them up! (If you can find Fruit by the Foot WAVE than you don't have to cut them)


Here it is with the kids balloons and Valentine's!

Wednesday, February 2, 2011

Valentine's Day Crafts

Here are some of the Valentine's Day crafts I've done.
XO Love Garland
Made from red, and pink paper and toilet paper rolls.

Now all I need is a cute wreath or something for that empty nail on my front door!

Heart Door Hanger
Made from flet, floss, and ribbon.

Sunday, November 28, 2010

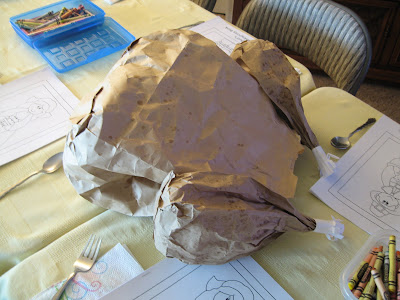
Thanksgiving

I thought I should show off what I made for Thanksgiving before I move on to all my Christmas stuff!


Ideas from Tip Junkie

Wednesday, October 13, 2010

Boo Season

BOO!

Well it is that time again! One of my favorite things to do in October is to "Boo" people! You know where you make treats and a cute little saying that says that they have to boo two others. Well we have been making treats and booing people lately and the kids really like helping mix the treats, licking bowls clean, eating the left over treats and then of course Booing houses! So here is my Mommy tip: find ways to let your little ones help... even if it means making a mess or getting caught at some of the houses, they will feel the joy of helping and serving others!


Here is another fun project that is easy and a good one for little ones to help.

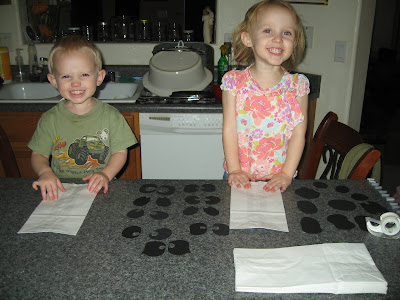
Here is what you need: white paper bags, some black paper cut into eyes and mouths, and tape (or if your kids are older and can use glue that works too).

Oh and you'll need a cute kid or two to help.

Put the tape on the eyes and mouth and stick them on the bags.


This is what we ended up with.


We also made bats!

Our house looks way better with our paper decorations up!
Linked up with:

Thursday, October 7, 2010

Halloween Wreath

I know I have been missing in action for a while... long story short, A LOT of failed project that have taken a long time and in turn it's taken me a long time to recover! But I'm back and do I have the cutest Halloween wreath EVER?! Inspired by this, I made THIS!


So here is what you need: a $1 wreath, $1 Happy Halloween foam sign, $1 ball of yarn, some monster green "Fun Fur" (which is on sale at Joannes starting tomorrow!), and googly eyes.

First start wrapping the wreath with your yarn. You don't have to be too careful like I was to make it perfect, because you won't be able to see imperfections!
Tip: Place the wreath between your knees and use both hands to wrap, it's WAY faster!

Then once you wrapped the wreath completely grab your "Fun Fur" and start wrapping in a random order. I was spacing my wraps from 1/2 inch to 2 inches apart. Then I'd switch the angles, until I liked the manginess of my monster wreath.

Then I hot glued my googly eyes on at random. Then to hang it I just took the ribbon that was on the Happy Halloween sign, fed it through the middle and hung! Pretty simple and super cute!

Linked to:

Saturday, September 11, 2010

Patriot Day

Ok I know that it's not the best picture and all but it's kinda hard to take a pretty picture during a party when people are hungry and ready to eat. I made this for Patriot Day!

Made regular red Jello topped it with whipped cream and blue star jigglers, I think everyone enjoyed the jigglers more than everything else. Next time I will just make red and blue star jigglers and serve it with some whipped cream.


May we always remember that we are free, and that in God We Trust!

Monday, June 28, 2010

Fourth of July

I love the Fourth of July! Maybe it's that I love the parties and excuse to celebrate our freedom or maybe it's because my birthday is on the 3rd, and I LOVE fireworks. Either way I love the Fourth and I could watch fireworks forever. Speaking of fireworks, this kind of reminded me of a firework and I had to make it. Plus I've been wanting something on my front door for months now! And now I do.

All you need is a cereal box, foil, paper, glue and tape.
I saw this in FamilyFun, I made it according to the directions but I still had spaces and rather than roll more paper I covered the cardboard with foil like the star and I think I like it better.
Easy, cheap, cute!

Linked up with:

Monday, June 21, 2010

Six Pack of Fun

This is what daddy got in our house! He loves cream soda!

The kids colored the labels.


*Found it on Sister's Stuff

Sunday, June 20, 2010

Father's Day Card

All you need is some plain paper and some patterned paper. Cut your 8.5 x 11 plain paper in half length wise. Fold it in half with the fold at the top. Cut slits about 1 inch from the fold. Fold down to make a collar cut out a tie, glue tie into collar. Paste buttons on and your done.