Wednesday, October 13, 2010

Boo Season

BOO!

Well it is that time again! One of my favorite things to do in October is to "Boo" people! You know where you make treats and a cute little saying that says that they have to boo two others. Well we have been making treats and booing people lately and the kids really like helping mix the treats, licking bowls clean, eating the left over treats and then of course Booing houses! So here is my Mommy tip: find ways to let your little ones help... even if it means making a mess or getting caught at some of the houses, they will feel the joy of helping and serving others!


Here is another fun project that is easy and a good one for little ones to help.

Here is what you need: white paper bags, some black paper cut into eyes and mouths, and tape (or if your kids are older and can use glue that works too).

Oh and you'll need a cute kid or two to help.
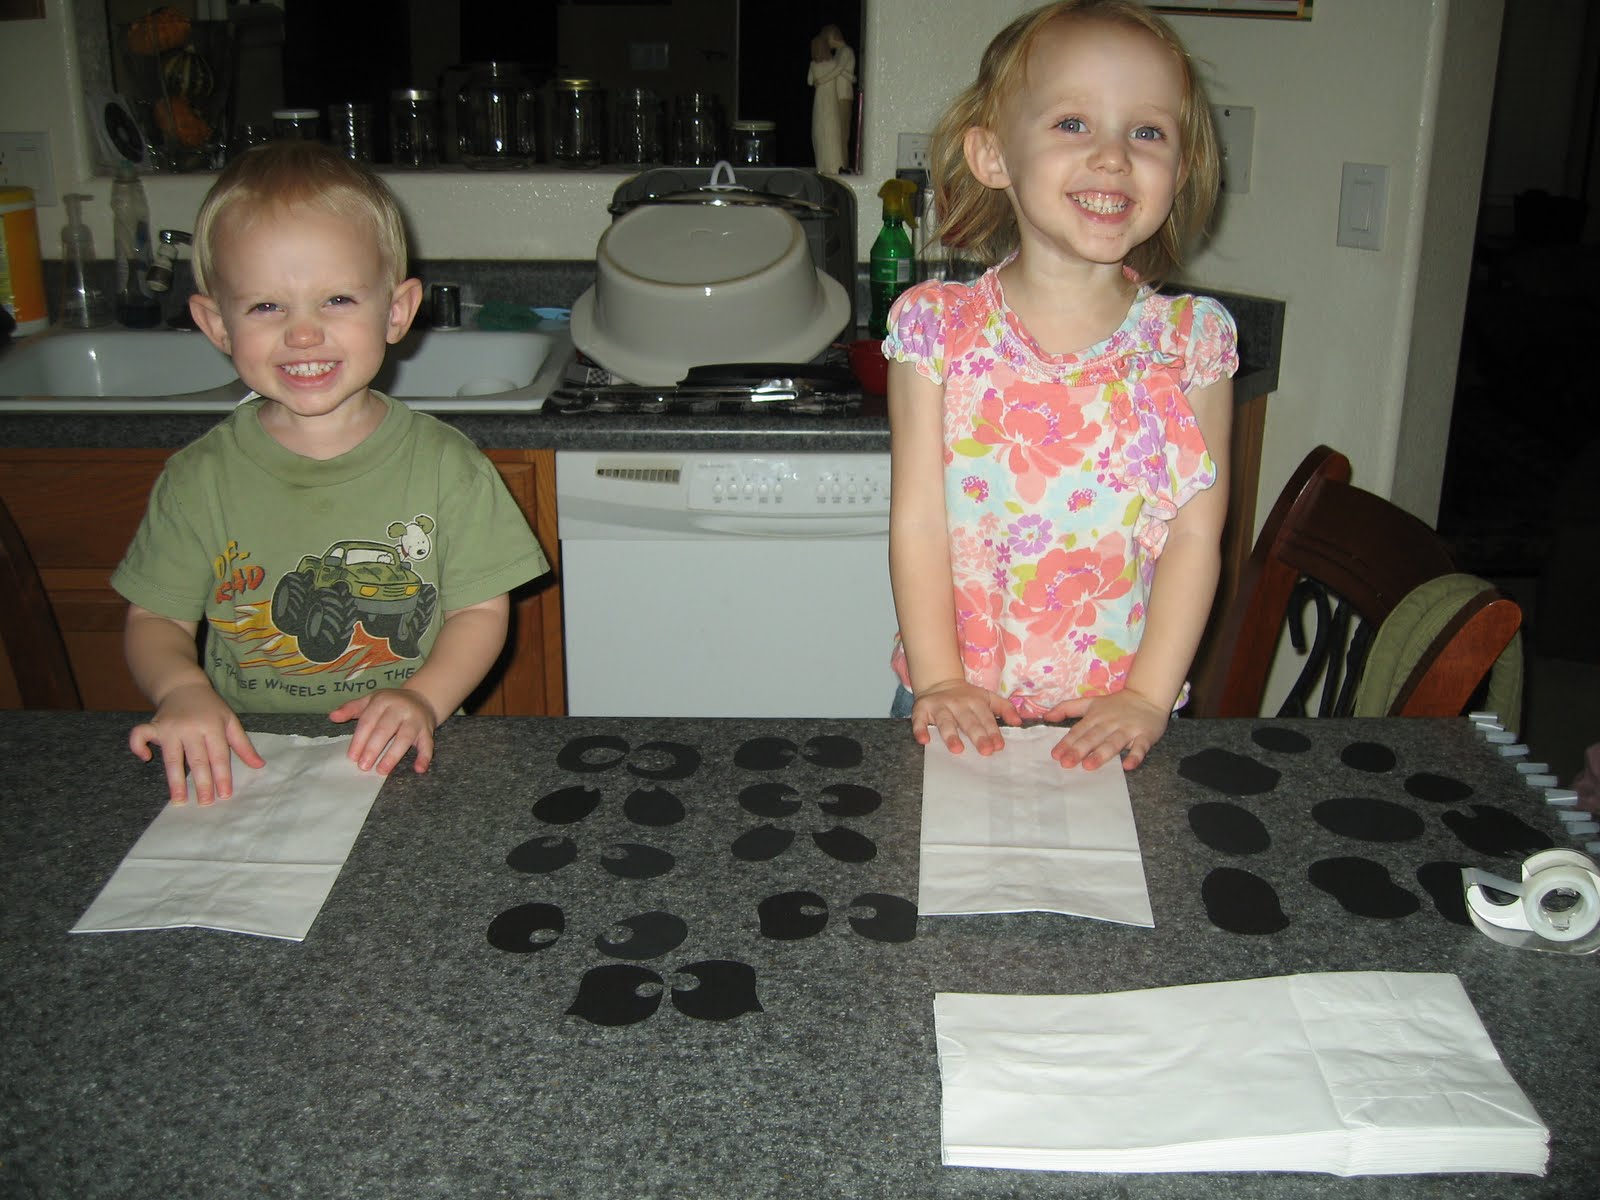
Put the tape on the eyes and mouth and stick them on the bags.


This is what we ended up with.


We also made bats!

Our house looks way better with our paper decorations up!
Linked up with:

Thursday, October 7, 2010

Halloween Wreath

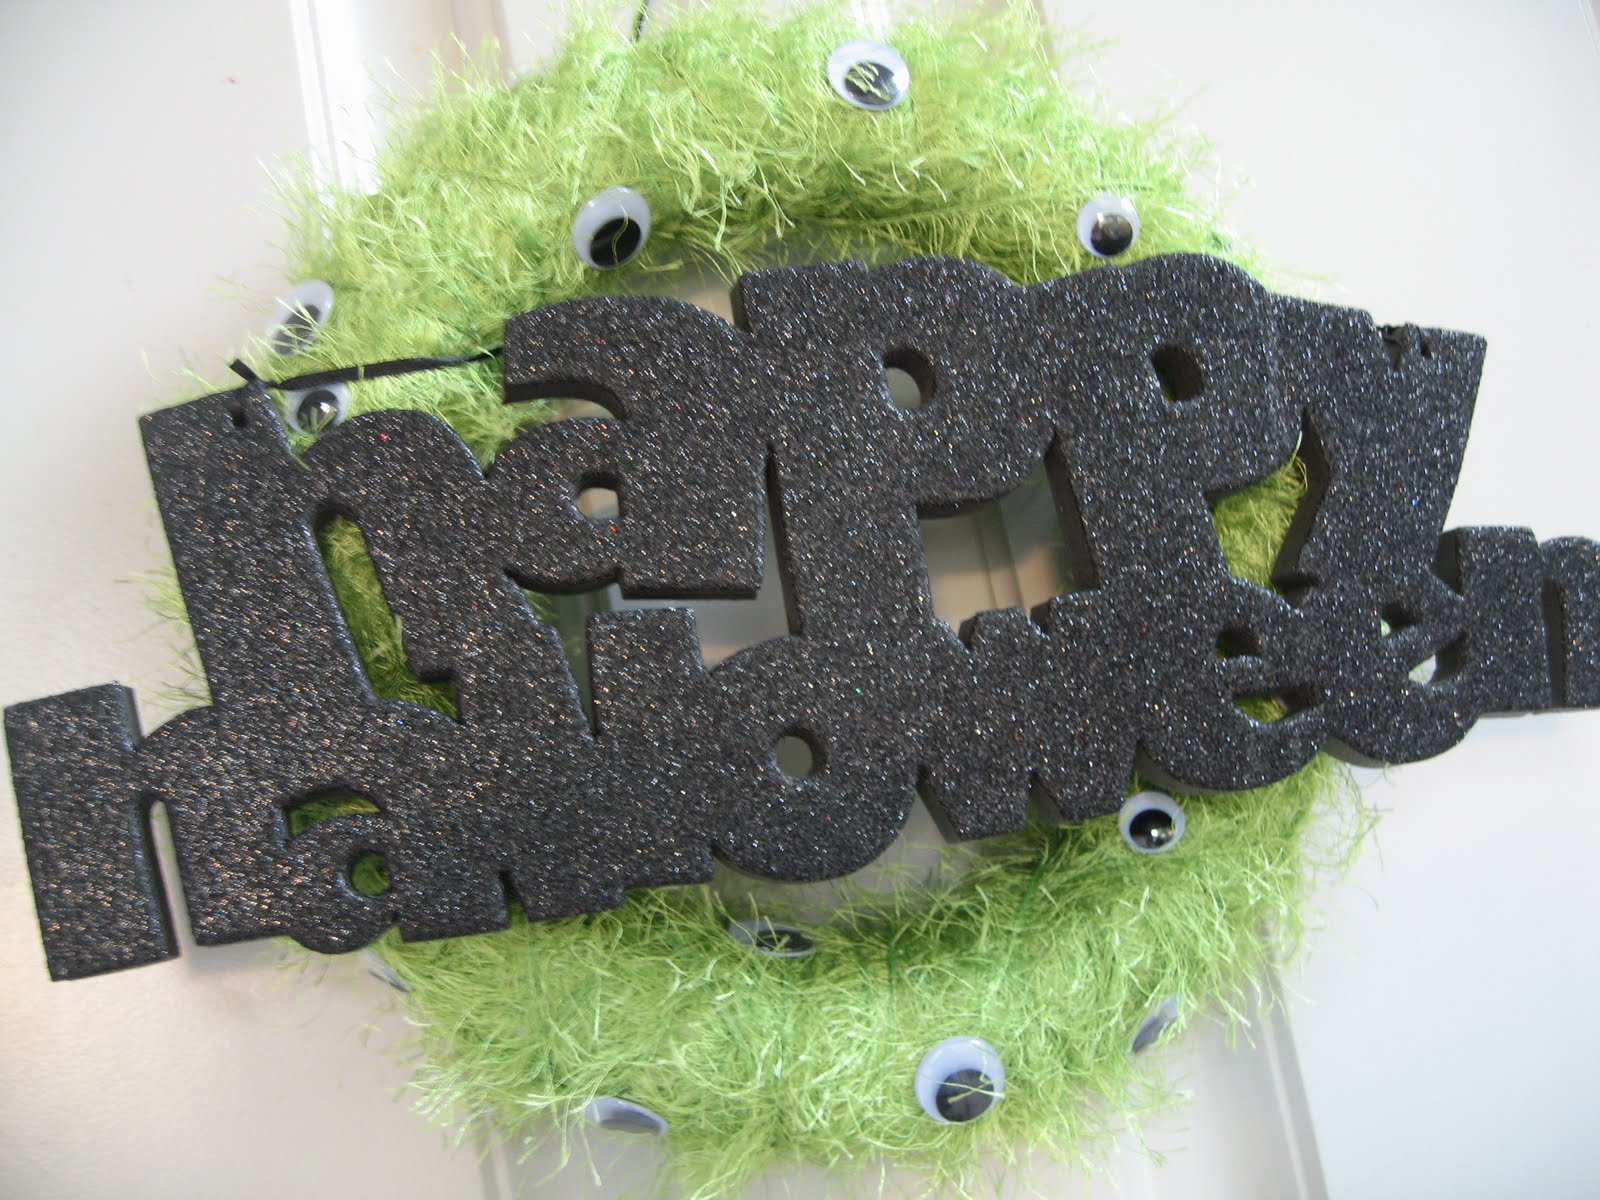
I know I have been missing in action for a while... long story short, A LOT of failed project that have taken a long time and in turn it's taken me a long time to recover! But I'm back and do I have the cutest Halloween wreath EVER?! Inspired by this, I made THIS!


So here is what you need: a $1 wreath, $1 Happy Halloween foam sign, $1 ball of yarn, some monster green "Fun Fur" (which is on sale at Joannes starting tomorrow!), and googly eyes.

First start wrapping the wreath with your yarn. You don't have to be too careful like I was to make it perfect, because you won't be able to see imperfections!
Tip: Place the wreath between your knees and use both hands to wrap, it's WAY faster!

Then once you wrapped the wreath completely grab your "Fun Fur" and start wrapping in a random order. I was spacing my wraps from 1/2 inch to 2 inches apart. Then I'd switch the angles, until I liked the manginess of my monster wreath.

Then I hot glued my googly eyes on at random. Then to hang it I just took the ribbon that was on the Happy Halloween sign, fed it through the middle and hung! Pretty simple and super cute!

Linked to:

Saturday, September 18, 2010

Talk of the Town Salad!

Ok so I've kind of been on a food kick lately, I swear I do crafts too just the ones I'm doing right now are taking forever!
I have a salad recipe that I guarantee will be a hit at your next party! The first time I had it was at my friend Lindsee's baby shower... my friends and I could not stop eating it! Now, ever since, I have been making it for my own indulgence. Well last night I took it to a party and it was a HUGE hit! So ladies here you are:


1 bag of Baby Spinach
half a pound of pasta (al denta), I used Rotelle last night but any kind will work.
1-2 grilled chicken breasts cut in pieces (fresh n easy has herb chicken already cooked and sliced)
10-15 cherry tomatoes cut in half
cut up Mozzarella Cheese, when I don't have a block I use string cheese.
Dressing:
half Pesto, half homemade Ranch to make about a 1 cup - 1 1/2 cup of dressing.


Tip: I usually put my pasta in while it's hot that way the spinach wilts a little. But putting everything in cold works fine too. And if you are making it for a party you may want to double or triple it, it disappears fast!
Linked to:

Saturday, September 11, 2010

Patriot Day

Ok I know that it's not the best picture and all but it's kinda hard to take a pretty picture during a party when people are hungry and ready to eat. I made this for Patriot Day!

Made regular red Jello topped it with whipped cream and blue star jigglers, I think everyone enjoyed the jigglers more than everything else. Next time I will just make red and blue star jigglers and serve it with some whipped cream.


May we always remember that we are free, and that in God We Trust!

Wednesday, September 8, 2010

Chicken Basil Sandwich

I love avocados, and bacon and the smell of basil! Add a few fillers and you have this!


I used to work at LifeTime Fitness its been years, but ever since I stopped working there I have been craving one of their sandwiches. Since I'm not going to pay $50 a month to eat at their cafe, and NOT workout I decided to finally satisfy my craving. Not to mention they probably don't even make it anymore.
Instead of making the sandwich exactly I have improved it by adding my own spin.
Here is what you need:

a hard roll (I used bolillos from Fresh n Easy), grilled chicken with herbs, basil, tomatoes, mozzarella cheese, avocado, crumbled bacon, and mayo.

First, mix up some mayonnaise with desired amount of bacon... in my case more than the mayo! Put it face down on your Foreman Grill or panini/waffle maker.


While you cut the mozzarella, avocado, and tomato, heat up your chicken if it's cold.
Then load up the sandwich.

Put the sandwich together and slap it back on the grill.

When the cheese is melty, and the bread toasty, it's done! And so YUMMY!

I'm pretty sure you'll have to make this one again and again because you'll be craving it after you've tasted it!


Wednesday, September 1, 2010

black to BLACK!

So I have been bursting with excitement for a while now, and now I will share the news... Have you heard of Totally Tutorials?... if you haven't, where have you been? Well, she hosts exchange programs and I'm a part of the Simply Spray exchange!!! I'm so excited, when I signed up I spent some sleepless nights coming up with things that I could do if I got picked! And I got picked! I received a box with cans upon cans of Paint it Black Simply Spray fabric spray paint. I was so happy when I read the email that said, "Congratulations! You have been selected to receive FREE Simply Spray Paint It Black Soft Fabric Paint. Thanks so much for applying to do the Free Exchange..." my eyes couldn't read fast enough before I squealed, jumped up and down, and almost cried! Yes I couldn't be more excited and have so many ideas to come.
Well first things first this is the no brainer thing to do with this lovely can of Simply Spray Paint it black, (I call it no brainer because it's what the can and the website tell you to do with the paint.) But just because it's a no brainer does not make it boring!
I'm sure we all have a black shirt or two that we wear under or over everything and it's been through the wash so many times it looks like you wore it in high school?...
Well this is my shirt, and lets just say it not only looks like I wore it in high school but I actually did wear it in high school! (I wish someone would have told me to dress better back then and informed me that after getting married and having two kids I would still be wearing those clothes!)

The picture doesn't do it justice but it really is dingy. If you look carefully you can see wear I spayed it with water in the left corner which makes it look like it should.

Before:

After:

First I got my dingy ol shirt and since it's stretchy I stretched it over a pizza box, I know I'm real scientific like that, then hung it outside.

Then sprayed it.

Let it dry and wear it!

Back to BLACK, soft and good as new!

Wednesday, August 25, 2010

Apple-Pickle-Carrot Sandwiches

OK I know that tuna is nothing new to anyone but I wanted to share how I have started to make my tuna. So far everyone that has tried it, likes it.
Growing up we would put dill pickles in our tuna mixed with mayo and that was it. I never knew that there was any other way to make tuna, never crossed my mind. So once when my mother-in-law asked me what I put in my tuna I thought it was a weird question because I just thought that everyone only put pickles, period. So when I answered pickles and she was still waiting for an answer I said... mayo.... tuna. On her end she was probably thinking "She only puts pickles? How weird!" She had a whole list of things and I found out that I really enjoy carrots in my tuna, thanks to her. And thanks to my grandparents I found out that apples add a sweet crunch. So here is my favorite tuna.
My three year old calls them "Apple-pickle-carrot sandwiches" kind of a long title I know! Grandpa even asked her if she wanted a tuna sandwich the other day and she simply told him, "I don't like tuna sandwiches." The reason: they aren't simply called tuna at our house.
My kids eat tuna sandwiches better than anything else... really... well... lunch food anyway!

It may sound like a weird combo but it is so yummy. You need tuna, half an apple (any color), dill pickles, carrots, and mayo. And I have noticed that adding fruit and veggies to it makes it stretch further and it's got to be more health, right?

Slap-chop it up! So easy and fast. Plus it's fun to let the kids help chop, both my kids love it.

Add a couple spoon fulls of mayo just enough to stick it together.

Slightly toast the bread and eat!

MMM...

I kid you not my kids plates are always clean.


How do you make your tuna?

Thursday, August 19, 2010

Drum Roll Please...

Well girls my first giveaway went well! And 1 lucky person will win all 25 of these cute cards!
Just to let you know that a few people where thrown in the hat twice because they were one of my first 10 followers... LUCKY!

AND THE WINNER IS...

BIGBEARSWIFE

Thank you everyone for participating! Congrats Angie!

Wednesday, August 18, 2010

Giveaway Last Chance

Here is another teaser...

If you want 25 cards handmade by me, today is your last chance! The giveaway ends at midnight!
Become a follower and comment, that's it!

Monday, August 16, 2010

Baby Gift

One of my friends had a baby shower last week and this is what I made her.
A diaper strap and matching changing pad. One cute convenient bundle with everything you need diapers, wipes, cream, and changing pad! No searching around for everything just a blind grab and you're good to go!


And it's reversible! So cute huh!

***Remember to enter the handmade card giveaway!***
Linked up with:

Reminder

Remember girls you're not entered to win the 25 cards giveaway until you COMMENT, yes you have to be a FOLLOWER but you have to COMMENT!

Wednesday, August 11, 2010

A GREAT BIG THANKS! (giveaway)

Ok girlies, let me just say that I am so so happy! I said that I would do a giveaway when I got to 50 followers and guess what... with the subscribers in Google reader plus my followers I have 52!YEAH, YAY, YEAH! Jumping up and down, I feel so special right now! You guys are the best! Really, I'm so flattered that most of my followers are people that I have never met! So thank youand I'm so excited to have you as my "blog friends"! So to say thank you I'm doing a handmade giveaway, I have made, with my own hands, 25 cards that I'm going to be giving to a lucky reader!

(just a little preview)

All you have to do is to be a follower or subscriber and then comment on this post. That's all! I would love to know who some of my subscribers are so if you are let me know!
Edit: The giveaway will close next Wednesday 18th at 12 midnight. I will pick a winner the 19th!

Monday, August 9, 2010

Bulletin Board 2

Look I'm on the internet at my house!! Yes we finally have the internet, I guess our neighbors got sick of us using their unsecured networks and blocked us out! To tell you the truth I'm surprised it's lasted a whole year! So I'm back, most of you probably didn't realize it but... I am happy that I'm back in business!
What have I been doing for a whole week with no internet you ask? Well I've been getting my craft on, and also going through withdrawals from the internet! I think it was good for me to get away from the computer, it helped put my priorities straight. So now I'm back, improved and ready to show off my stuff. Most of my projects just got started not finished but I did finish a few!
Remember a long time ago when I said I was going to finish my bulletin board well I finally did! I love it, I find myself just admiring it every once in awhile. Now I just need to finish everything else on and by the desk to complete the whole project! I've got a good jump on it all though now!

Much better don't you think?
I ironed ribbon on the edges, gives it a nice finish I think.

Then I took some felt and my fabric that I didn't dye (so it would stand out a little more), and made a flower.


It went from this...

To this...

And finally to this!

(It also helps to take horrible picture the first few times, it makes your final project look really good!)