Thursday, December 23, 2010

Cute Toes

Deck your TOES with boughs of holly! Fa la la la la, la la la la!

I'm going to show you how to do it! I didn't take step by step pictures so I'm showing you with computer animated pictures.
Start off with silver and then once that's dry take a toothpick and make three red dots of holly berries at the corner of your toe.

Then cut one end off of your toothpick, take some green and make two dots where you want your leaves to be. With the pointy end of the toothpick slide from the middle of your bottom dot out through the second.

Then repeat for the sides.

TA-DA! Cute Christmas toes! (Real paint this time!)


Monday, December 20, 2010

Last Minute Holiday Treat


Have you had ideas of grand desserts that you would pass out with your handmade cards, wrapped with ribbon and glitter. Well me too, but the fact is you have run out of time! Let's make something yummy that is quick and cute and will still make you look impressive. Here it is:


Celestial Chex Mix (my way)

3/4 c butter
1 c white kayro
1 c sugar
4 c rice chex
4 c corn chex
4 c cinnamon chex
2 c shredded coconut
1-2 c sliced almonds

First you are going to want to toast about a third of the coconut and ALL of the almonds, (to toast spread out on a foil covered cookie sheet and broil for a minute or two. TIP: do NOT do anything in between putting them in and taking the out! They will burn!) Then in a large bowl combine cereals, coconut and almonds. Next in saucepan combine butter, sugar and kayro. Bring to a boil and boil for 2 minutes stir constantly. Pour over cereal mixture, coat and mix. Last spread on wax paper till slightly dry to touch, separate into bite-sized clusters.

It goes together fast and it is SO yummy, now all you need are some cute bags. Staple a paper with your name on it and TA-DA! I thought it would be a good thing to make and have at home so that when those unexpected friends come with a treat, you have one to give them!

Linked up with:

Monday, December 13, 2010

Cute Magnet Board

This is what I made for my sister in law for Christmas. This year for the gift exchange we set a dollar limit on the gifts, and I came up with this magnet board/recipe holder.

I totally forgot to take a before picture but it looked a little like this ming porcelain plate except it was tin and you could tell it wasn't porcelain. It was a whopping .50 cents at a thrift store.

I spray painted the edges white, and found some cute scrapbook paper, which I then Mod Podged to the middle.

Lately I have been kind of obsessed with keeping all bottle caps off of our drinks and so I took a few Izzy's caps. (I love izzys)! I covered one of them just so I could have more orange but I didn't even have to cover the others because they are so cute. The things that I had on hand made it easy to stay in the budget but if you had to buy the Izzy's, paint, paper, magnets and cloths pins you would still have a pretty cheap gift!

Covered a couple clothes pins and stuck magnets on them and TA-DA! A very cute $1 gift.


Linked up with:

Monday, December 6, 2010

Snowflake Decorations for Cheap!

I love decorating with snowflakes around this time. Maybe it's because where we live in AZ there is no snow: it's a chilly 71 degrees outside right now! And I love hanging stuff from my ceiling, it just makes things look so much cuter!
So here is my winter wonderland! Want to know how to make the big snowflakes? I'll show you!

Here is what you need: White lunch bags, scissors, tape, and string.

Fold in different places and cut whatever feels good. Let me give you a tip: there is so right or wrong way even if you think the cut looks silly*, once they are open they look great. And snowflakes are all different so have fun experimenting with different cuts.

On some of my snowflakes I alternated two different cuts and on some I didn't.
(*See how mine look like chicken and boobs... they turn out cute when you open them.)

Once you have cut your bags to your hearts desire, now it's time to start taping. Don't open your bag, just tape the edges together near the bottom. You will be taping one side each, to the other.

Make sure your bottom is folded up still and pinched with the sides as you tape.

Let me show you a little closer make sure the V is pinched down before you tape.
You don't want the V.
Bad / Good

Once you have taped all of your bags together it should look like this

Here is a different design.


Then hang! Ta-da!


I love it! It would be so cute if you were having a party to put them up all over with some of those tissue paper pom poms.

So let it SNOW. let it SNOW, let it SNOW!
Then I tied it into my other decorations by wrapping some presents with snowflake paper.

Sunday, November 28, 2010

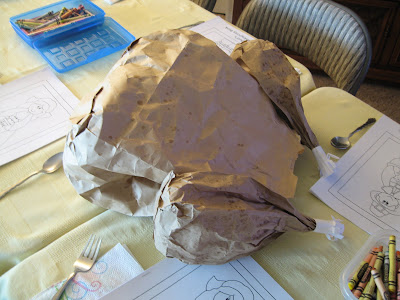
Thanksgiving

I thought I should show off what I made for Thanksgiving before I move on to all my Christmas stuff!


Ideas from Tip Junkie

Wednesday, November 24, 2010

Suggestions for Christmas

My Gift To Jesus

I know that not everyone celebrates Christmas but there are a lot of you that do. I have recently learned, from a few wiser than I, GREAT ideas for Christmas. The first is for giving gifts to your children... each child gets 3 gifts, each in a different 'category'. They give one gift for fun, one spiritual gift, and one gift to develop that child's talent. I love this idea, and will be starting this tradition in our family!


The second was an idea from my mother in law, and it will take from now, STARTING TODAY, to Christmas to change for the better to be able to "Give a gift to the Savior" this Christmas. The ideas is that it takes approximately 30 days to change a bad habit and to start good habits in the classical conditioning of the mind. So for the next 30 days STOP one bad habit, and START doing something good and work on it each day. Then by Christmas you will have a gift to give to Jesus. I also think that the Christmas spirit will be working everyday till Christmas so it won't be so hard to remember the "true meaning" of Christmas! And to help you start READ THIS, it is one of my favorite things to read to motivate me to get me in gear, even if you are not of the same faith it is a good read.
What are some other traditions that you do?

Sunday, November 21, 2010

50 Free Cards

Have you heard, Shutterfly is giving away 50 FREE Christmas cards! If you have a blog check it out HERE.
If you have never seen their cards you have to check them out! They have Christmas Cards and Photo Cards. I can just picture my family on this one I think my kids bright blue eyes would just pop! Oh and the next birthday party you plan, THESE would just be the "frosting on the cake!"
Shutterfly is also great for gifts for the holidays, a calendar for your husbands office, a mug for grandpa! And I love giving photo books to friends and family, it's such an impressive gift that is shared over and over.
I use Shutterfly for ALL of my pictures. I am not kidding all of my pictures are backed up on Shutterfly, if the picture is not uploaded to their site it's still on my camera so I will not loose any if my computer crashes. Plus I love all of the extra stuff you can make with your pictures, did I mention I love Shutterfly, cuz I do!

Saturday, November 13, 2010

Kitchen Makeover

It's been a while, yes I know, we have been sick and I haven't felt like doing much but watch movies all day long. Although, I think we are pulling out of it and getting better so I have no excuse now.
I have been waiting FOREVER to show this off so this will make up for lost time!
In our neighborhood they have a 'big trash day' once a month, where you can basically put anything you can't fit in a trash can on the side of the road and someone comes to pick it up and takes it away for you. Well before official trash guys come it's free game! So this is what we picked up a while ago for FREE!

It was in alright shape but the plastic is old and was cracking off the handles,

and the stickers were all gone.

So I took it and turned it in to this!

Water and ice dispenser

Dishwasher buttons.

Oven and burners dials.

Made burners, with tin foil and orange paper.

Added buttons for the microwave.

Covered the handles with packing tape and then Mod Podged fabric over them.

Then made it so there was a landscaped picture in the window.

I did spend $1 on the light above the stove.

I love how it turned out!

So thanks person in the neighborhood that didn't want this anymore, we love it!
Linked up with:

Wednesday, October 13, 2010

Boo Season

BOO!

Well it is that time again! One of my favorite things to do in October is to "Boo" people! You know where you make treats and a cute little saying that says that they have to boo two others. Well we have been making treats and booing people lately and the kids really like helping mix the treats, licking bowls clean, eating the left over treats and then of course Booing houses! So here is my Mommy tip: find ways to let your little ones help... even if it means making a mess or getting caught at some of the houses, they will feel the joy of helping and serving others!


Here is another fun project that is easy and a good one for little ones to help.

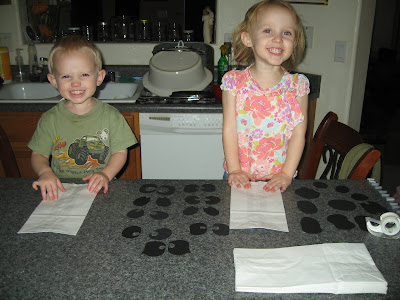
Here is what you need: white paper bags, some black paper cut into eyes and mouths, and tape (or if your kids are older and can use glue that works too).

Oh and you'll need a cute kid or two to help.

Put the tape on the eyes and mouth and stick them on the bags.


This is what we ended up with.


We also made bats!

Our house looks way better with our paper decorations up!
Linked up with: